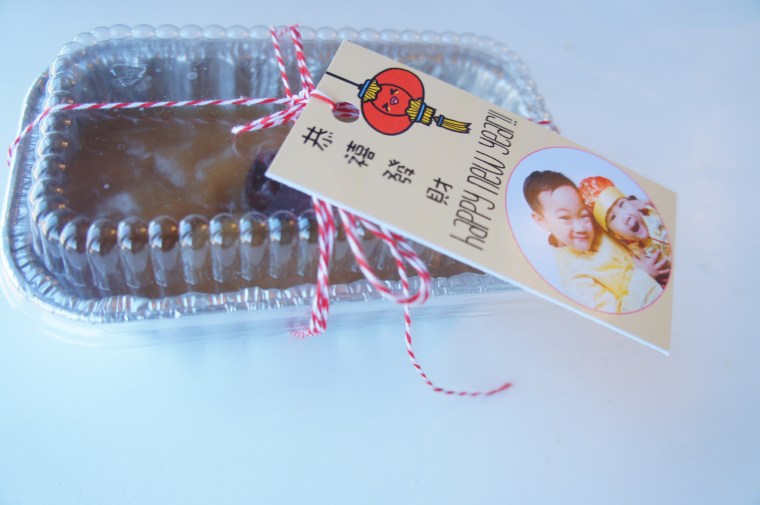
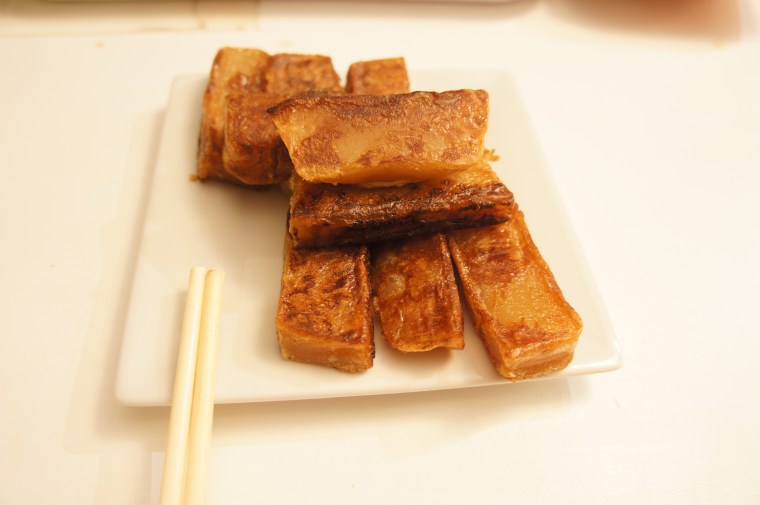
“Lo Bak Go”- Chinese Turnip Cakes

img_2154

This one is going into my “Grandma Stephy’s Recipe Book”. Yes, I have a notebook that I have started a few years ago, where I write down some of my favourite recipes. I don’t care if people don’t use paper and pens 200 years later. My great-great-great-great-great- grandkids will read and try out this recipe book.

Chinese New Year is coming up again (January 28th, 2017 this year). So in hopes of staying on top of things, I’ve started prepping for it. I’ve already made my “Nin Go making Kit” (I measured out all the ingredients so that it’s SO much faster to make. For my recipe, go hereΒ .) and I wanted to add “Lo Bak Go” to my Chinese New Year food this year.

“Lo Bak Go”, or Chinese Turnip Cakes, is a type of savoury cakes that you can often find at Chinese dim sum. If you’ve never had it before, think of it as a “meat loaf” type texture, but made with mostly turnips rather than meat. It can be served steamed or pan fried. I personally like it steamed, with a little bit of soy sauce. Soft, warm, and savoury.

The recipe I’m sharing today is from Christine’s RecipesΒ (This recipe is in Chinese. I tried looking to see if she has it in English, but haven’t been able to find it.) She has a wide variety of recipes, and her Chinese cooking recipes are great for beginners, too! I also have both of her cookbooks and they are super handy to have!

Enough intros. Let’s roll up our sleeves and get ready to work!
img_2159

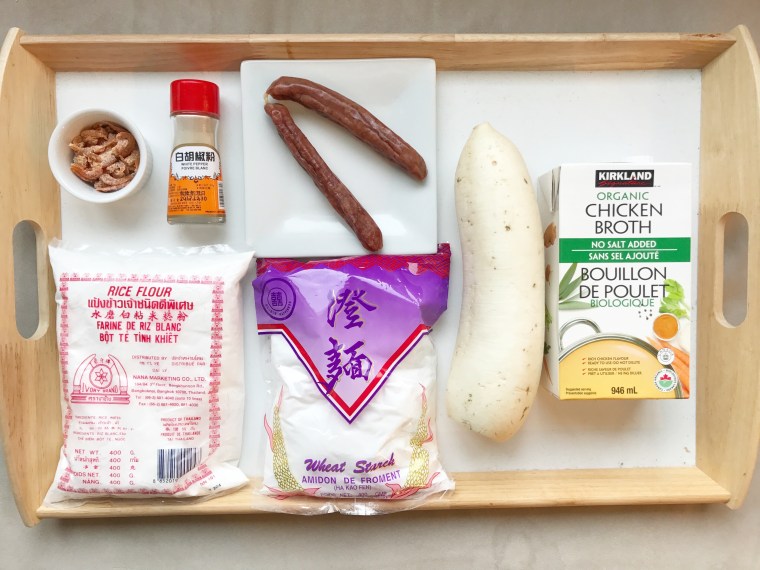
This is what I used for this “Lo Bak Go” (“Lo Bak” is carrot in Cantonese. “Go” is cake. Simple, right? ) You will probably need to stop by your local Chinese grocery store for most of the ingredients (or China town grocery store. Yes, I believe that there’s gotta be a China Town ,or Chinese street, in many cities out there.)

The sausage looking thing is Chinese preserved sausages. They can be chicken, pork, beef, or even turkey. I just took whatever ones I have from my fridge. Richard happens to like to throw one or two into the rice cooker to cook with the rice. And now my boys like it, too…sigh. And then there’s the dried shrimp. Can I call it shrimp even though they are so tiny? You will probably need to get them from the Chinese grocery store as well.

In terms of the rice flour and wheat starch, you might be able to find it in your neighbourhood store. If you go to the Chinese grocery store around January, these ingredients should be very easily accessible. That’s when lots of grandma’s like to make Turnip cake for Chinese New Year. Yes, I called myself a grandma. Darn proud of it! Just wait until I’m actually one. No pressure Jordan, Julian. I can wait for another 25 years. πŸ˜€ .

Here comes the “fun” part. The very reason why I don’t usually make “Lo Bak Go”. The prep work….

img_2158

Soak the dried shrimps in warm water to soften up. At the mean time, quickly boil the sausages in hot water for a few minutes. Dice it all up! If you like to have chunky pieces, then just rough chop them. I do have to warn you, if you have them too chunky, these pieces will fall out of your “Lo Bak Go” when you eat them. No big deal, just personal preference. I usually mince the dried shrimp because I know my boys would find them too crunchy, but they do give good flavor.

Then, set up your Netflix, pull up a chair, and grate those turnips. You can tell that’s my favourite part of the process (sarcasm intended…). Come to think of it, THAT’S WHY my right bicep hurt the other day! Don’t say I didn’t warn you. You don’t have to grate them too finely, because you still want some texture.

All the prep work done? Next….

img_2157

Heat up a frying pan, add oil, and stir fry the preserved sausages until fragrant. Add in the dried shrimp and do the same πŸ™‚ . Put it aside. Β It smells really good hehehe πŸ˜€

img_2076

Using the same pan, cook the grated turnip (with its juice). Sprinkle with salt and white pepper. Cook with lid on for 10 minutes on medium-low heat, or until turnip become transparent and soft. You should have more fluid than you started out with at this point. Depending on how much water is in your particular turnip, you might have more or less. Add in the chicken stock (or vegetable stock/water) and cooke for another 5 minutes.

Now mix in the rice flour and wheat starch. I usually mix half first and then the other half. If it’s too thick, add more fluid. You can decide how soft or dense the texture of your cake is at this point: if you like it softer, add more fluid. It should be the consistency of a thick but easy to stir paste. You don’t want to see anything too mushy or liquidy (so add the fluid slowly). If you like it more dense, you may add a little more stock and keep it at a dough like consistency. After a few times making “lo bak go”, you will find your preference. Just remember that, if it’s too soft, you may have a hard time slicing the “lo bak go”. In that case, just eat it as steamed “lo bak go” and make another batch but denser for the pan fried ones!

Then add back in your preserved sausage and dried shrimp.

img_2156

This is what I ended up with. I tried to “show” the consistency in the picture by pressing down on the batter. It’s soft but not liquid-like. After this, pour it into an oiled pan and steam for 45-60 minutes, or until a tooth pick comes out clean. You’ll have to adjust the time depending on the depth of your container.

img_2155

I always make mine in a round pan. From what I know, the Chinese culture sees the circle shape as a symbol for completeness and togetherness. So on Chinese New Year, being the new beginning, we like to make/have/see things in this shape.Β It does make slicing it in uniform pieces difficult but I’m not concerned about that. If you want to be able to slice them in the same size, like they do at dim sum, make them in a loaf pan. Super flexible.

To serve, slice and pan fried with some oil on medium heat until golden! My boys like to eat them as snacks or for breakfast. Julian can eat a good 6 pieces in one go! That boy can eat, let me tell ya.

I hope that when someone asks my kids and my grandchildren about what kind of Mom/grandma I was like, one of the things they would tell them that I inspired them to learn about my culture/language because I always cooked yummy food. That they remember watching me make it for them, or making it with them. Because that’s what I think about when someone asks me about both my grandmothers. ❀

Thanks for reading,

Chat soon,

Stephy


Lo Bak Go (Chinese Turnip Cake)

Recipe adapted from Chirstine’s Recipes

Β 1 kg turnip (usually about 1 1/2 of turnip)

1 1/4 cup rice flour

4 tbsp wheat starch

1-2 pieces of Chinese preserved sausages , or “lap cheong”

1/4 cup dried shrimps

salt and white pepper

3/4-1 cup of chicken broth/vegetable stocks

1. Soak the dried shrimps in warm water until softens, about 15 minutes. In the mean time, blanch the preserved sausages for 2-3 minutes. Dry well and dice finely.

2. Wash, peel, and grate the turnip.Β 

3. Combine the rice flour and wheat starch. Mix well.

4. Heat up a large pan/wok, add a 1-2 tablespoons of oil.Β SautΓ© the preserved sausages over medium heat. Stir in the dried shrimp andΒ sautΓ© for a few more minutes. Remove from pan and set aside.

5. Using the same pan, cook the turnip on medium heat until soft and translucent. About 10 minutes. Sprinkle in salt and white pepper. Remove from heat, add rice flour and wheat starch,Β stirring it into a thick batter. Stir in theΒ preserved sausages and dried shrimps.Β 

6. Pour the mixture into an oiled pan (I used an 8″ round cake pan) and steamed over high heat for about 45-60 minutes. Make sure you have enough water for the whole cooking time.Β 

7. Let cool completely. The cake can be kept in theΒ refrigerator for 2-3 days. To serve, slice into pieces and pan fry both sides on medium heat, until golden brown.Β 

***Note: I omitted a few ingredients from Christine’s recipes due to eating preferences.

10 Ways to read that “AGAIN?” book …again…


I don’t know about you and your babies, but Jordan wants to read the same book over, and over again. What? Your kids, too? Yep.

I can’t blame them. Them wanting the same book read over and over again, is like us being a regular at our favourite coffee shop or restaurant. You walk in, you know what to expect and how to behave, the staff knows you, you know them, they know your order, you have a good time! What’s not to like?

I’m not going to put on my teacher hat and tell you all the theoretical reasons why children like to reread the same book, or why we SHOULD reread the same books. I’m sure there are better websites out there, with more authority on this regard than I do, they can explain it all to you.

What I plan to do is share some of the things I do that keeps me from feeling like a running record, and also makes the rereading more fun with the little ones. You might already be doing them, but it’s always good to try again πŸ™‚ .

1. Take turns reading the pages.

If you have read the book many many many times with your little ones, I’m sure you have noticed that he/she loves to chime in as you read. Why not give you little one a chance to try it on his/her own? You read one page, and have him/her read the next. Or as much as he/she can of the next page. Just give them a few more seconds to remember.Β You might be surprised.

2. If they are handling #1 well, let them read more of the story to you, and you play the supportive/backup role.

Depending on the book and the age of your child, he/she may even be ready to read the whole book (Or most of the book) to you. Start them off by reading the title AND the author (Knowing that someone wrote the book is important, too!) together, maybe even read the first page with him/her. After that, let them take the lead and allow them to show you what they can do!

3. You read most of the story, and invite your little one to read/talk as one or more of the characters.

If you are reading a story where the characters talk to each other (For example, “The Three Little Pigs”), invite your little one to play the role of one of the characters (5 bucks says they will want to be the wolf πŸ˜‰ ) The next time you read the book, switch characters with each other.

4. Better yet, read and tell the story with props!

Don’t panic! Props can be as easy as a piece of paper with a picture of the characters. If you have puppets of the characters, that’s great. If not, it can take as short as 1 minute to make some. If you have post-it notes handy, draw the characters on them and stick them to your finger. Voila! For a little more, you can print pictures of the characters and glue them stir sticks or popsicle sticks (The next time you go to that coffee shop, grab a few more stir sticks *wink wink* πŸ™‚ ). There are so many more ways to make simple, easy puppets for the characters in your story. Bonus: put these puppets in a ziplock bag with the story book and Tah-Dah! You’ve got yourself a little retelling story package to take ono the road!

5. Act out the story!

I know, I know. It’s 8 o’clock at night and the last thing you want to do is get up from that comfy bed of theirs to move and pretend to be Daddy Pig from Peppa Pig. Let’s give it a try! No Drama class teacher here judging your performance. Just your little one seeing Mommy and Daddy enjoying literatures and playing with him/her. Do yourself a favour and pick a short story to start with. It might take a little practice to do the entire Harry Potter story on your first go. Plus, you do want your little one to sleep at some point, right? You can be as low key as acting it out with no props (Imagination is the key! Just say “Oh and here’s that big cave we are about to go into!” and gesture a big cave in front of you. Don’t go and build one. Your significant other may not be happy.).

6. Create actions to go with the story.

Children’s book are full of patterns. Whenever you spot a pattern, make up some action to go with it. For example, when you read “Brown Bear, Brown Bear, What Do You See?” with your 18month-old, you can point to your eyes, and have him/her point as well, when you say “see”. Again, it doesn’t have to be complicated. You’ll be amazed how very simple things can make all the difference.

7. Read the story in a quieter/slower/quicker/squeakier/robotty-er voice.

Use a different voice. Try reading at a different speed or rhythm tonight. You can be silly and try reading “Moo, Baa, LaLaLa” in a squeaky voice! Obviously, you don’t want to be too too silly because you are probably wanting your little one to wind down for bed, but a little fun and snuggles would hopefully make bedtime routine smoother.

8. Try not reading the words this time.

What I mean is, try focusing on just the pictures tonight. Talk about the things that you see in the pictures. Talk about what the characters are wearing or how they are moving. Talk about what they might say, or what else they might say. This might be challenging for adults, too, being so use to reading the words in these stories.

9. Letter/Word hunt

This is for those of you with older little ones (maybe age 4 and up). If they are ready (for example, if you know that he/she knows a certain letter/word very well), then, before you start reading the story, say “Oh my goodness ( πŸ™‚ come on, some drama here will make them want to do it with you! Lol) ! I noticed a letter E here (point to it…)! Let’s have a contest and see who can find the most E’s in this book! Ready?!”

Give it a whirl.

10. Let them choose!

Give them a few of these choices and see what they would pick! As long as you are sitting together, spending time together, and enjoying the time together, anything goes! Don’t forget hugs and kisses (or a high five!) before the lights go out!

Enjoy your read together.

img_2174

Thanks for reading.

Chat soon,

Stephy

10 Things Stephy

Just a few things so that you get to know me a bit more~ I wonder how many of these are obvious to my friends and family?

10thingsstephy-01

1. Earl Grey tea (Early Grey Creme , to be exact) makes me go *Happy Sigh* πŸ™‚

2. So does Sunshine.Β 

3. I’m a sucker for pretty and girly stationery and journal books.Β 

4. Also a sucker for sentimental written messages (both electronically or hand written…hand written preferred…). Both writing it and receiving it. Β 

5. I’m a cup hoarder. I, myself, owns about 20-30 cups and travel mugs.Β 

6. I’m Β an autodidact… Doesn’t mean I’m good at any of the things, but I search, and I learn.Β 

7. I do a little quiet applause (with a big grin), when I really like the food I’m eating.

8. Sometimes I do this little spin around on the spot thing when I’m trying to figure out or remember which way I’m supposed to go. My friends call this the “pigeon Stephy” because I turn around in circles like a pigeon.Β 

9. I tend to make people cry..: either happy tears, or “look, let’s face it” tears…sorry…

10. Anything coffee and coffee places. ‘nuf said.

So there you go! Something new (or not so new) about me!

Thanks for reading.

Chat soon,

Stephy


My DIY Mala Neclace

IMG_1451

Just how did I discover Mala necklaces?

I think it was one of those days when I felt like I needed something to re-energize myself. Something that will lift my spirit up, like a mantra or an affirmation, something that will re-direct my energy. So I googled and , one thing led to another, I stumpbled upon a picture of a pretty beaded necklace with a tassel— Mala necklaces.

Now, I’m not religious, just to put it out there. I do, though, believe that our thinking affects our energy, and visa versa. So since I was gathering some new affirmations and mantras, I thought I could use a Mala necklace (plus, they are pretty πŸ™‚ ) Β The “Type A” in me says, “I must have one NOW!” , and I proceeded to research on how I can make one for myself. There are many tutorials out there on how to make it, and here’s how I made mine.

IMG_1394

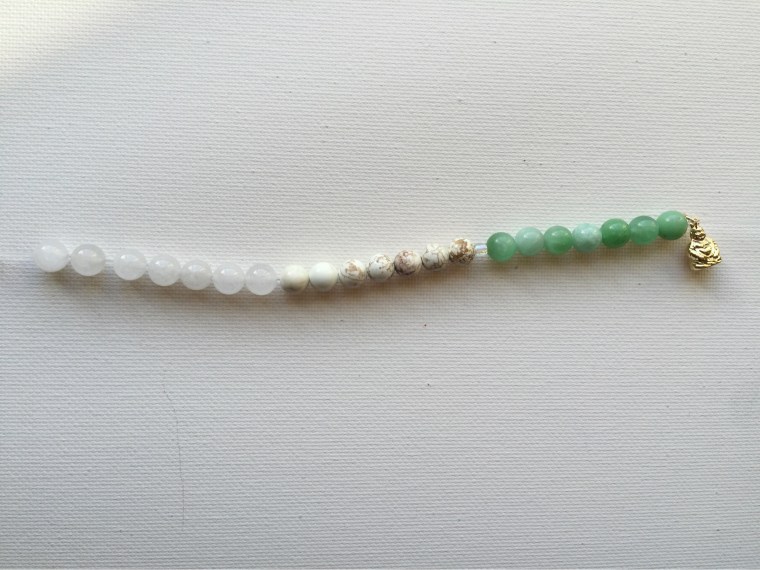
I went to Michaels the next day (Michaels was already closed when I was researching…so I kind of had to wait …haha), and they happened to have a sale on their beads (it’s so meant to be!). I got some amazonite, white howlite, and white quartz. Β I did some quick research on gems and stones and their “abilities”, but I based my decision largely on the colour combination. Mala necklaces have 108 beads on them. It usually includes a guru bead, which is a larger bead/stone that tells you you have completed one round of chanting. I didn’t see any larger stone that I liked at the time so I went with a small little buddy charm in place of the guru bead. You can do what works of you. If you are using the Mala necklace as an accessory, then I think a charm (or a few) would be really cute. I love the tassel on the Mala necklaces I saw online, so I got some embroidery floss to make my own tassel. Of course it had to be pink πŸ™‚ .

Map out the pattern or design of your necklace. There are a few styles of Mala, depending on how you like your beads grouped. You can string all 108 beads just one after another, or you can separate groups of them with a marker bead (does not count as one of the 108 beads). I grouped mine like so: Charm-7-marker bead-14-marker bead – 66 – marker bead – 14- marker bead- 7. I just used a small clear bead as the marker bead.

IMG_1458

After you have your design figured out, start stringing! I started with the charm and went all the way around. If you are a scattered brain like me, may I suggest that you count the beads and group them prior to stringing. Saves you recounting every 20 seconds. And maybe you shouldn’t be watching TV at the same time…just saying~

IMG_1457

IMG_1456

Keep going until you have all of your 108 beads on your string. I did not count my charm as one of the 108 beads, in case you are wondering. If you are happy with it, tie a double knot to close it up, and put a dab of the E6000 craft glue on to secure the knot. I found the stretchy string doesn’t knot every well so the glue is for sure a good idea. If you are using silk string or other fabric string that is less slippery, you can probably omit the glue.

IMG_1454Now onto the tassel. Find a piece of card stock that is the desire length of your tassel (mine happens to be the packaging of my stretchy string (Less stuff to look for!). Β Wrap your embroidery floss around it numerous times. The more you wrap it around the card stock, the thicker/fuller your tassel will be. When you are done, slip a short string of the embroider floss across the top part of the tassel and tie a knot. Slip the tassel off the card stock, and wrap the short string around the entire tassel again and tie a knot. Snip the extra sting (the left over short strings after you tied that knot.)

IMG_1413

To attach the tassel onto your necklace, slip another short string through the top of the tassel and secure the tassel to you necklace (See photo above). Β I placed mine beside the little budda charm. Β Comb out the tassel with your fingers, and trim a bit off the end of the tassel to create a straight, clean finish.

IMG_1455

Β  Β  Β  Β  Β  Β  Β  Β  Β  Β  Β  Β  Β  Β  Β  Β  Β  Β  Β  Β  Β  Β  Β  Β  Β Voila!

I am totally loving my DIY Mala necklace! As an accessory, it brings a simple outfit together. It goes well with a sundress, T-Shirt and jeans, or over your yoga wear. Plus it gives me something to fidget with. As a meditation tool, I found it helps me even just to play with the beads throughout the day when I need a quick reminder of my affirmations. My next goal is to get into some sort of habit of meditating. Even if it’s just minutes every other day.

IMG_1453

IMG_1434

Let me know if you have any questions. And please tell me how you like your new DIY Mala necklace! Thank you for reading ❀ !

Chat Soon,

Stephy

DIY Mala Necklace

Materials: (I got mine from Michaels. You can find them at most craft and arts stores or online.)

-108 beads of your choice. Make your decision based on the stones you like or your colour scheme.

-A charm or a guru bead

-Marker beads. If you choose to use them.

-Stretch string or silk string

-Embroidery floss, if you are making a tassel.

-Scissors

-E6ooo craft glue

Happy Mala making!

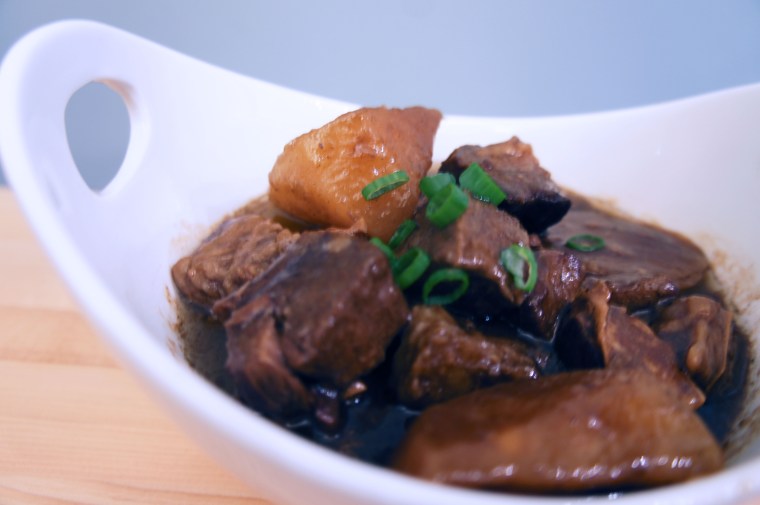
Chinese Stewed Beef Brisket in Chu Hou Sauce

SONY DSC

I’ve recently discovered that food is one way I express care and love. You JUST found out? You ask. Ya, a little late but better than never.

The Chinese Stewed Beef Brisket in Chu Hou Sauce is my go-to dish. It’s fancier than stir-fry. It’s a treat for all my Ung boys at home. It’s convenient because you can make it the night before or freeze it after. It goes with any sides (rice, noodles, potatoes, bread.) I’ve made it for potluck, when we have company over, or as gifts to friends and family as a token of appreciation/support.  Is this my favourite dish to eat? No. I make it because I care about the people that I made this dish for. If I make this for you, it shows you mean something to me.

Ready?

So here’s what you will need. If you are not familiar with the asian sauces, hopefully the pictures will help you find them!

SONY DSC

These are the ingredients that you will need: Beef brisket, star anise, rock sugar, ginger, and daikon.

beefbrisket3

And these are the main sauces that you will need. You should be able to find them at your local asian grocery store or stores in China Town. Show them this picture and they should be able to help you find them! Obviously they are available in different brands but it should still have the same name.

So, the brisket. This is usually what it looks like when I buy at the store. Try to pick one(or ask your butcher to pick) that is not too fatty. Or else you wouldn’t have much meat left after it’s been stewed. One of these usually is about 2 lbs.

beefbrisket4.jpg If you are lucky, or if you smile really big and ask really nicely, your butcher might decide to be helpful and cut the brisket into cubes for you at the store! In my case, sometimes, the butcher does it for me (I’ve only had that luck maybe 2 out of 5 times…worth a try though!), sometimes, I just smile and ask Richard really nicely. Hee hee! I don’t really like cutting big slabs of meat….
beefbrisket5.jpg

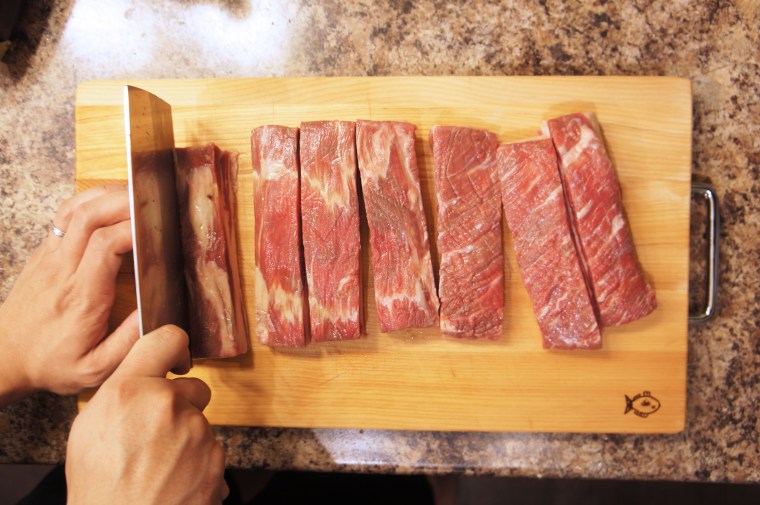
You cut the brisket into bite size cubes. I like them on the smaller size but it really depends on the piece of brisket that you got. If it is quite fatty, you will want to cut them into larger cubes so that there’s still meat left  after the fat melts away during the stewing process. Up to you! And yes, these are not my hands. I asked Richard really nicely today to help cut the meat so I can take the photos πŸ™‚ !

SONY DSC

In Chinese cooking, sometimes we blanch the meat before further cooking it. Place meat in a pot of cold water with a few slices of ginger, green onion, and Shao Hsing cooking wine. Bring to a boil and let it cook for 5-8 minutes. You will see the excess fat and blood in the water as you boil. Rinse meat in cold water immediately to stop the cooking process.

When you are done blanching the brisket, make sure you drain all the access water so that it will sear well and seal in the juice and caramelize nicely. I use my Le Crueset dutch oven when I make this dish. I totally love it! You can use any large size pot that you have, too!

SONY DSC

Sear the brisket in hot oil with a few slices of ginger. They don’t have to be perfectly seared on all four sides. As long as most of them are getting some color. This helps enhance the flavor of the brisket. When I’m feeling really lazy, I skip this step. It’s not a huge difference.

Then you are going to add the Soy Bean Sauce and the Chu Hou Sauce and let the sauce heat up with the brisket for a minute. I couldn’t take a picture of it because this is a quick process. The sauce will begin to burn if you let it cook too long. Just mix it until it is fragrant and most of the brisket are coated in the sauce.

Then you add the water, rock sugar, and the star anise. Bring it to a boil, and then simmer it with the lid on.

beefbrisket8.jpg

You can smell this, can’t you? πŸ˜€

Now, the daikon. No, I didn’t forget them! After you have stewed the beef brisket for about an hour and a half (or two hours, if you want them to melt in your mouth. Richard likes it with more of a bite to them still.) Cut up the daikon and put them in the pot! Stew everything for another 30minutes.

beefbrisket9.jpg

If I’m making this dish the night before, I usually just put the daikon in, bring it to a boil, and turn the heat off to let it sit on the stove. The residual heat, along with my dutch oven, will cook the daikon, but not enough to break it down. When I’m ready to eat it the next day, I just have to heat it up, and the daikon would be perfect. Not too mushy, not too hard.

When you are ready to serve the beef brisket, pour in a corn starch mixture (with oyster sauce, sugar, cold water, and corn starch) to thicken up the sauce so that it coats the beef brisket.

beefbrisket10.jpg

And you are ready to serve!! I LOVE rice, so I always have mine with rice. You can always serve it in broth with noodles, or you can serve it with flat bread or a bun! Whatever you are in the mood for!

SONY DSC

Writing this post makes me hungry…. I think i have some left over stewed beef brisket in the freezer…
A great Sunday dinner. Comfort food. Leftovers for lunch (or no left over!). Give it a try and comment to let me know how it goes!

Chat soon,

Stephy

Stewed Beef Brisket in Chu Hou Sauce

Ingredients

*2-3lbs (or 1-1.5Kg) of Beef Brisket

*1 Daikon (about 800-1000g, depending on how much you like them)

*4-5 slices of Ginger (the size of a large coin and about 1/8′ thick)

*3 Star anise (I really like the flavour of Star Anise so I might even do 4 for a larger pot)

*1 piece of rock sugar (about the size of a large grape, 20-30 g)

*1 green onion

*2 tbsp Shao Hsing cooking wine

*1-1.5L water (enough to cover the brisket)

Sauce

*3 tbsp Chu Hou Sauce

*2 tbsp Soy Bean Sauce

Thickening Sauce

*2 tsp oyster Sauce

*1 tbsp corn starch

*2 tbsp water

What to do:

  1. Blanch the brisket with 2 slices of ginger, green onion, and Shao Hsing cooking wine. Drain well.
  2. Sear the brisket with the rest of the ginger on medium high heat until most of the pieces have caramelized.
  3. Add in Chu Hou sauce and Soy Bean sauce and stir quickly so it doesn’t burn.
  4. Add in enough water to cover the beef brisket. Add in rock sugar and star anise. Bring to a boil.
  5. Reduce heat to low and stew for 1-1.5 hours(until tender). 
  6. Add in the daikon. Bring to a boil, and reduce heat to stew for another 30minutes (or more if you like the daikon softer).
  7. Just before serving, pour in the thickening sauce and bring stew to a boil again.
  8. Serve hot with rice, noodle soup, or a bun!

Note: This dish freeze well. I usually let it cool down and put it in a large ziplock bag.

Enjoy!

Thanks for reading!


Simple Crochet Dishcloth- Thank you, nurse!

SONY DSC

Two months ago, my youngest son, Julian, had to have surgery and stayed at the Stollery Children’s Hospital. Long story short,we discovered he had congenital hernia and they had to operate on him asap. Scary.

But let’s focus on how fortunate we were to have been at the Stollery and worked with many wonderful and caring medical professionals. We felt so taken care of, and supported, Β it made this difficult time an easier pill to swallow.

And I want to thank them all.

I wanted to give them something more meaningful (handmade) and show that we put thoughts into it. I knew I would bring them treats for sure (Who doesn’t like treats?),but I also want something that they can keep. So after talking to a few friends and searching on Pinterest, I decided to make them dishcloths. It’s affordable, quick and easy, so that I know I can make it happen even with 2 young children. It’s a little more useful and meaningful than a little doll or a figurine that just sits there (those are lovely, too. I’m just kind of practical that way…) And, these “dish clothes” can also be used as trivet (I had to google that up lol), or just something pretty to put anything on!

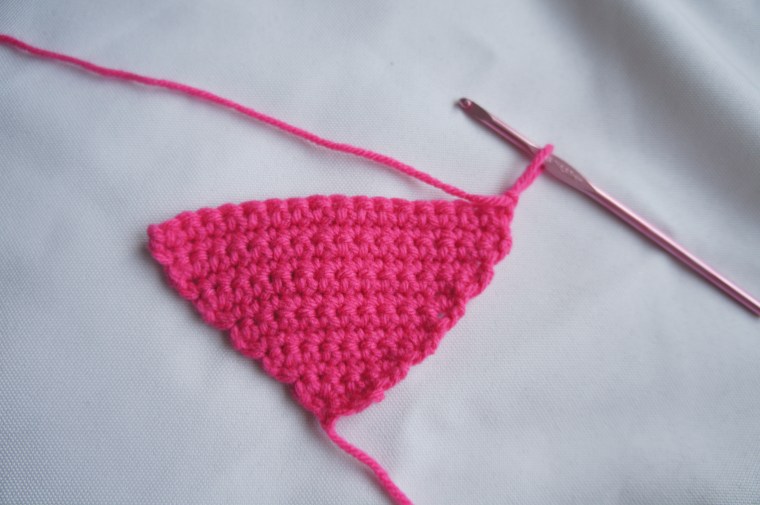
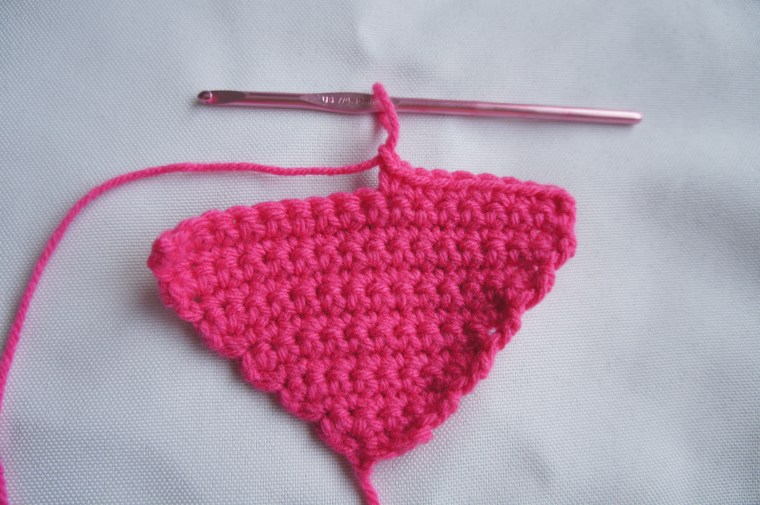
This dishcloth is super easy, and made with double crochet stitches. This allows it to be more flexible and dries out faster. Also faster to make. Efficiency is important here when I have to make 16 of them in a limited amount of time.

Start with a chain of 24. (or more if you like them wider.)

SONY DSC

Now all you do after this is double crochet. Back and forth. Back and forth.

SONY DSC

SONY DSC

After about 12-13 rows (depending on how tight or lose you crochet), single stitch all around the piece to get a tidier edge.

IMG_9275 copy

Easy, right? Perfect beginner’s project because it’s easy and fast. AND you can use it or gift it!

I got the yarn when Michaels had their buy one get one 60% off sale. I use the small size Bernat Handicraft yarn. Which makes 1 to 2 dishcloths. Or I can make 3 dishcloths with 2 balls of yarn. I bought quite a few different colours, and got Jordan to help pick some colors, too.

Here’s the pattern for the dishcloth:

Materials:

Any 100% cotton yarn. I used Bernat Handicraft yarn.

Size 6mm hook

Pattern:

Ch-Chain

dc- double crochet

sc- single crochet

Ch 24.

R1. dc into the 3rd stitch from the hook. dc all the way to the end of the row. Β ch 2. Turn.(22)

R2-12. dc across the row. ch 2. Turn. (22)

When reach desire length. sc all the way around the piece. Space the sc as even as possible. Make sure that the sc are not too tight as that will curl the piece. It’s better to have it loser rather than tighter.

Fasten off.

That’s all!!


When I finally had these dishcloths done, I put together a little gift pack for each of the nurses that worked with Julian. Julian was in isolation care for most of the time we were at the hospital, so we would always have one nurse that stayed in the room with him. They were all so amazing. As a mom, what I appreciated the most was that, not only were they caring towards Julian, they also went above and beyond to make Jordan’s day. They would play with Jordan and take him around the ward with them. They also took care of us. Made sure we have everything that we needed, and that we are caring for ourselves.

It was a tough time both physically and emotionally, but these nurses (and Julian’s surgeon) made it the warmest and safest experience it could be (sounds weird but really). I’ve always had a lot of respect for nurses. This time, we are also grateful.

IMG_9920

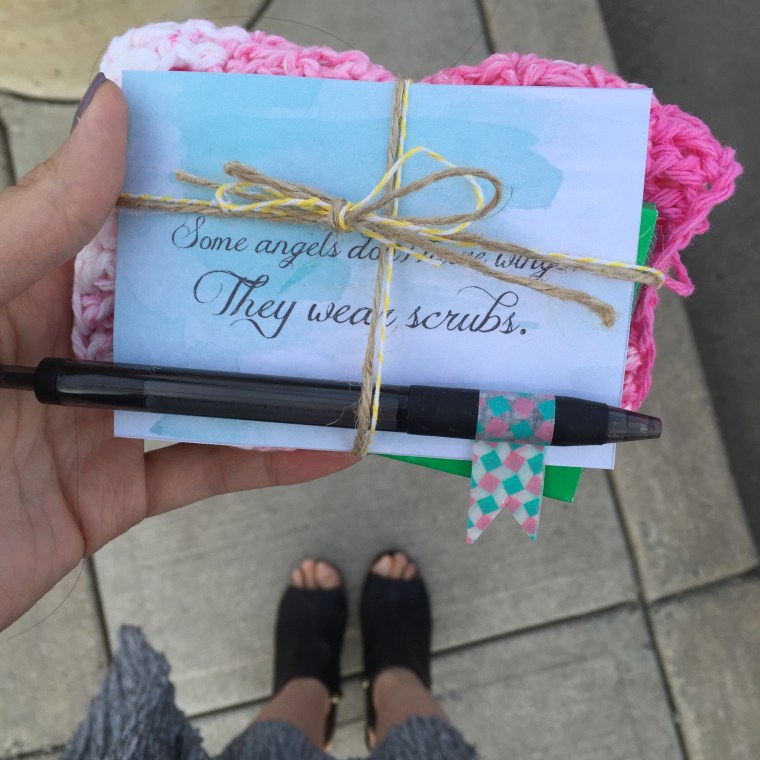
I wrapped up the dishcloth with a pack of gum and a black pen (I was told thats what nurses use and always lose lol). I also made a card for them that says “Some angels don’t have wings. They wear scrubs.”

thankyounurse

If you ,too, want to show your nurse that you appreciate them, feel free to download the pdf and use it.

Download

I’ll leave you with a picture of my lovely-and-all-better Julian.

julian

Grateful.

My little buzz lightyear.

Chat soon,

Stephy

If you wish you share the pattern, please link to this site. Thank you.

Sweet Pear Stew – A Simple Chinese Dessert

SONY DSC


You’ll probably hear me say this again and again. After I become a mother, I have a stronger desire to connect to my roots. I want my children to have a sense of heritage and a connection to the culture. So I started looking into more and more Chinese cuisine recipes.

Here’s the problem: I Β feel that Chinese dishes are kind of “Ma Fan” (Cantonese for troublesome and a hassle.) You have to learn about the new ingredients and prepping takes forever. I’ve got two young children so I’m about efficiency and convenience at this point of my life!

So when I see a dish that I want to try, I often ask myself: How do I “Stepherize” it? Meaning, adapting it so that it’s a quick and straight forward recipe. And I feel that many young moms of this generation would love recipes like that, too!

Anyway.

I love Chinese desserts. There’s a category of Chinese desserts that’s especially appealing to me: sweet soups. They are soups that are served hot and sweet, and the ingredients are all softened from stewing. And according to Chinese medicine and cultures, each kind of sweet soup serves to balance and rejuvenate certain functions of our bodies (That’ll be another post one day). So today, I’ll share with you my quick and easy Sweet Pear Stew.

For this recipe, you only need 3 basic ingredients: Ya-Li Pear, rock sugar, and water.

SONY DSC

Richard got me this cute little pink ceramic pot in Hong Kong over Christmas, it’s perfect for making individual sized dessert!

I cut up my pear into small chunks so it would cook faster and it’ll fit in my little pot.

SONY DSC

Add enough water to fill the pot. Then put in your sugar. You decide how sweet you like the stew! I usually put in a few small chunks. Make sure you cut out the part that surrounds the core of the pear. If you don’t, it’ll make your stew slightly more tart.

SONY DSC

That’s how much rock sugar I use. Some times I put more, depending on what I feel like.

The next part is a little tricky. In Chinese cuisine, there’s a method of cooking called “dun” (Dun Dun Dun!!! πŸ˜€ sorry, couldn’t resist….). Which is kind of like steaming, except the container is half immersed in the boiling water. I guess it’s like when you melt your chocolate on a double boiler?

I make it work by using my sauce pan filled with with about 2-3 inches of water, then I use a small dish or a lid to elevate my pink pot so it is not in direct contact with the heat. Make sure you use something sturdy. And if it’s a small ramekin, fill it with some water facing up so that it won’t move around in the pot. Once, I made the mistake of putting it upside down, thinking it would make it more sturdy. Not engineer material right here!

SONY DSC

I found these in my kitchen that I can use to elevate my pink pot in the sauce pan: a jar lid, a porcelain ramekin, and a ginger grater. Basically, anything small and that you can put in boiling hot water.

SONY DSC

You can see the little ramekin underneath the pink pot here.

Stew it for about 20-30 minutes, and you have yourself a simple, healthy, and just perfectly fruit dessert stew! How easy is that? The best part? You have minimal dishes to wash after this!! (Can you tell I don’t like doing dishes? πŸ™‚ )

Drinking this Sweet Pear Stew often is supposed to help “sooth” your chi and hydrates your body. I’m not a medical profession, obviously, but this is what I was told by all the Chinese “po po’s” (grandmothers)! And grandma’s always know best!

Let me know how you like it!

Love,

Stephy


Chinese Sweet Pear Stew

1 Β  Β  Ya-Li Pear

Small chunk of rock sugar (approximately 10g. Adjust to taste)

1/2 Cup Water (depending on the size of your container)

  1. Cut the pear into small chunks.
  2. Put all ingredients into a porcelain container with a lid.
  3. Place a small dish or ramekin inside a sauce pan and fill it with enough water to touch the porcelain container.
  4. Place the lid on the sauce pan. Cook on medium for 20-30minutes.
  5. Serve hot.

You can add other ingredients into the recipe to enhance flavor. Try red dates or Chinese almonds.


IHeartYou Coasters

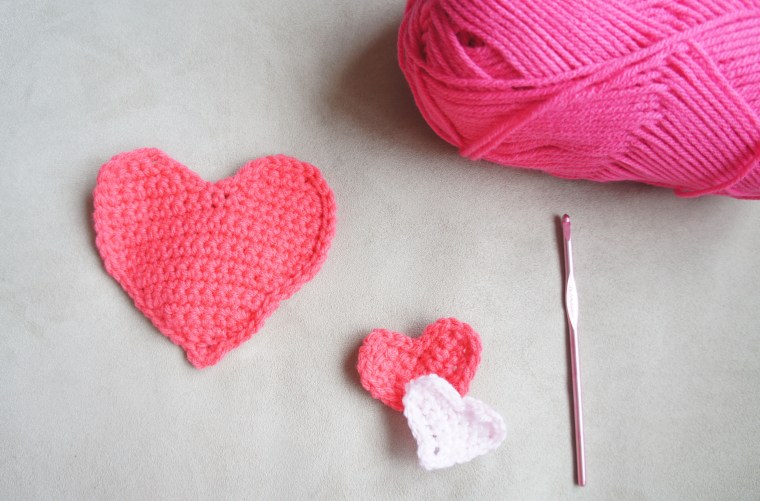
Happy Love Day! I have so many Valentines, I love this special day πŸ™‚ ! I really wanted to make something pink and cute for this day, but it has to be something easy and fast! So I decided to make coasters! Who wouldn’t want more cute coasters?!

SONY DSC

The original pattern came fromΒ Bella Dia, and it is meant to be a garland. I modified the pattern, shrinking it, and making it a bit taller, so its the perfect size for my tea mugs :).

Materials:

-I used an old ball of yarn in a pink color. It is a medium weight yarn. Any medium weight yarn will work really easily with this pattern.

-4.5mm hook

Stitches used:

ch: chain

sc: single crochet

inc: increase by making two stitches in the same stitch

dec: decrease by joining two stitches to become one

Pattern:

Ch 4.

R1. Sc second stitch from hook. Sc the rest of the row. Ch 1, turn. (3)

R2. Inc in the 1st stitch. Sc 1. Inc in last stitch. Ch 1, turn.(5)

R3. Inc in the 1st stitch. Sc 3. Inc in the last stitch. Ch 1, turn.(7)

R4. Sc all stitches across the row. Ch 1, turn. (7)

R5. Inc in the 1st stitch. Sc 5. Inc in the last stitch. Ch 1, turn. (9)

R6.Β Inc in the 1st stitch. Sc 7. Inc in the last stitch. Ch 1, turn. (11)

R7.Β Sc all stitches across the row. Ch 1, turn. (11)

R8.Β Inc in the 1st stitch. Sc 9. Inc in the last stitch. Ch 1, turn. (13)

R9.Β Inc in the 1st stitch. Sc 11. Inc in the last stitch. Ch 1, turn. (15)

R10.Β Sc all stitches across the row. Ch 1, turn. (15)

R11. Inc in the 1st stitch. Sc 13. Inc in the last stitch. Ch 1, turn. (17)

SONY DSC

R12. Begin making one of the lobe of the heart. Sc 8. Ch 1, turn. (8)

DSC02511.JPG

R13. Dec 1, sc 4, dec 1. (6)

R14. Dec 1, sc 2, dec 1. (4)

R 15. Dec 2 (2). Fasten off.

Part 2:

R1. Insert yarn at 9th stitch in R12. Ch 1, sc 8. Ch 1, turn. (8)

SONY DSC

R2. Dec 1, sc 4, dec 1. (6)

R3. Dec 1, sc 2, dec 1. (4)

R4. Dec 2 (2). DO NOT fasten off!

Sc all the way around the heart. At the tip of the heart (the pointy part), sc 1, ch 1, sc 1. Fasten off and sew in lose ends.

DSC02519.JPG

To make the coaster nice and flat, mist it with water and pin it down flat and let dry. (Or look up “crochet blocking”)

I love making coasters because they are fast and easy! It doesn’t take much yarn, and you can pretty much make whatever shape you want. An instant crochet “happy sigh” moment πŸ™‚ ! I made a few smaller hearts just because it’s cute! They are made by crocheting in rows rather than in rounds (or with magic ring). You can find the pattern here.Β I like that better because there isn’t a hole in the middle of the heart. We can’t have a hole in any heart!!

Now go and give out lots of hugs and kisses today!!

Happy crocheting!

SONY DSC

I’m so new with designing and modifying patterns! Please let me know if any clarification is needed, or if there is any error in the pattern!

If you wish you share this pattern, please link to this site. ThankΒ you.Β 

“Playing” the Piano

So the other day when both boys were up and I have a free moment, I decided to go play my piano for a bit. Okay, if you are a mom, or have young toddlers in your life, The Murphy Law of Mom with toddlers states, “Anything that you are doing, your toddler will want to do”. Jordan immediately came to see what I was doing (I had literally began to play the second bar of my music…. πŸ˜₯ ! ).

He started helping himself to smashing the piano. I had enough sleep that day so I was able to think instead of react and tell him to stop, which probably wouldn’t work so well anyway. So instead, I said “Oh that’s really loud music you are playing! Sometime real pianist plays music that’s loud and low like that!”

And that began our piano play time that I had not anticipated.

piano1

(Sorry for the picture quality! I need to work on taking a photo and playing at the same time! :p )

We played with all kinds of sounds, style, and tempo: loud, soft, high, low, fast, slow, bouncy, long, short. He also got some fine motor play as we played using different fingers. And his favourite was, of course, key smashing lol.

Jordan had a blast experimenting and playing the piano. I do have to say that I’m not trying to “teach” him piano (Piano teachers out there, I’m sure you have more “proper” way of teaching piano πŸ™‚ ), it was just a moment of play.

And we always have fun playingΒ πŸ™‚ .

piano2


Chinese New Year Cakes

ningo1.jpg

Chinese New Year Cakes are like Β a taste of childhood. They are warm, sweet and chewy, with a hint of ginger or coconut flavour. I began making my own Chinese New Year Cakes a few years ago, while I was pregnant with Jordan. At the time, I was thinking about the family traditions that my new family would have. I asked myself, “What will my children remember about their childhood?”

I knew right away that I would want my children to remember something special about Chinese New Year. Yes, they will, of course, remember the red envelops that they are going to get, but I want them to remember “the taste of Chinese New Year”. So I decided to start with the New Year Cakes. I will call them Nin Go from here on (The Cantonese name).

There are generally two types of Nin Go: Ginger Cane Sugar and Coconut. I personally likes the ginger one more, so that’s the only one that I make :). Richard loves anything chewy and sticky so Nin Go is perfect for him. He often eats half a Nin Go in one sitting.(Word of caution here, Nin Gos are quite filling. Eating too much in one go will result in the “clomp in your tummy”kind of feeling! Haha! Don’t say I didn’t warn you!) Either kind of Nin Go is super easy to make, and ingredients are easily accessible at your local Chinese market. So take a look and what I have here and give it a whirl!

Since I usually make the Ginger Cane Sugar Nin Go, that’s what you will see here in this post. You can easily adapt the recipe to make Coconut Nin Go πŸ™‚ !

Ready? It’s super easy to make and very low maintenance. First, your ingredients.

nin go2.jpg

These, my friends, is all that you will need to make Nin Go. You can easily get them at your local Chinese grocery stores. (The coconut milk here for this Nin Go is optional. I use just a table spoon of it for a hint of color and flavour. You can omit them if you don’t want to have to wonder what to do with the rest of the can of coconut milk.)

I start by making the cane sugar syrup for the Nin Go. Boil 2 cups of water, 300g of the cane sugar, and a few slices of ginger together for a few minutes until the cane sugar dissolves. Let the mixture cool (I just pop it in the fridge for half an hour.)

DSC02484.JPG

When your sugar syrup has cooled to room temperature, add in 1 tbsp of the coconut milk (if you choose to). At this point, you can add the syrup to the flour mixture. Does it really matter what you add to what? The answer is, I have tried both ways and I don’t notice a difference πŸ˜› . So do as you like! The mixture will be clumpy but don’t worry! These will help:

nin go3.jpg

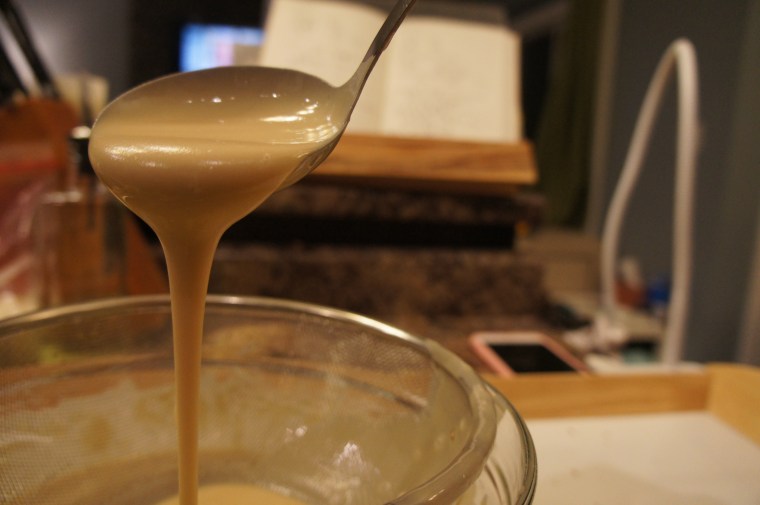
It doesn’t really matter what size of a sift you have. Of course the bigger the easier, but whatever gets the job done! Run the batter through the sift twice to ensure a smooth batter. Your batter should run like a thin pancake batter.

DSC02487.JPG

If you find your batter too thick, just add a couple of table spoons of water to thin it down. Β I find runnier batter result in a softer Nin Go. Just make sure that you don’t put too much water in or else you’ll have a blob of Nin Go instead of something that has a shape.

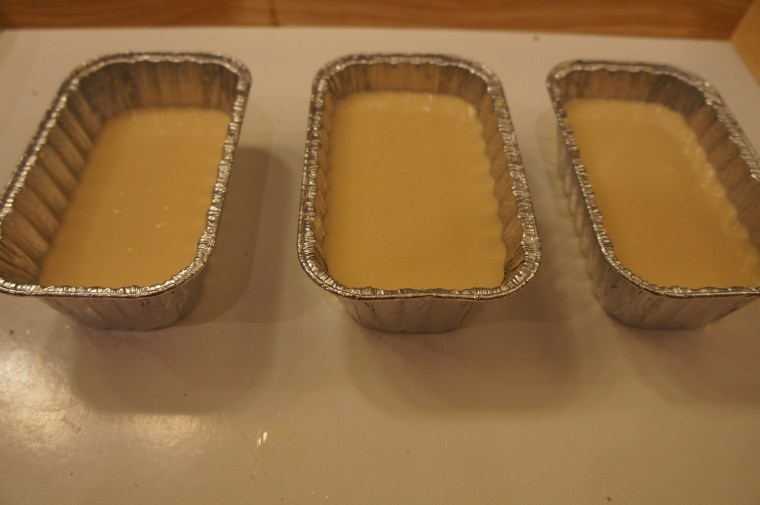
And the Nin Go is ready to be poured into the containers and steamed!! This recipe will fill an 8″ round pan (about 3/4 full), or a few of these small loaf pans.

DSC02488.JPG

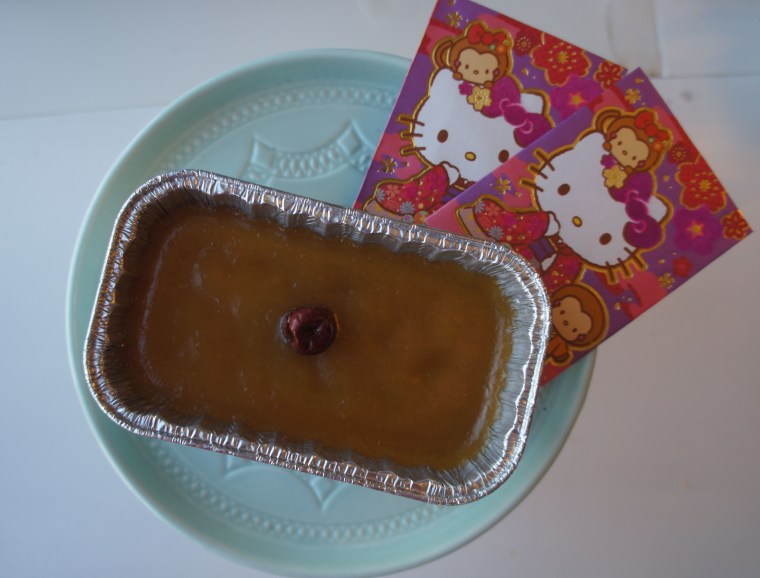
I usually steam the 8″ size for about an hour on medium high heat (on my stove it’s 8), or 50 minutes for these little guys in the picture. As soon as they are done, I like to put a red date in the middle for decoration. Just a pop of color πŸ™‚ ! Then I leave them in the steamer to cool off.

SONY DSC

Tah Dah!!!

Richard, my hubby, likes to eat them fresh and warm as it is. Or you can also prepare them the traditional way: dip them in eggs and pan fry them on low until golden brown and soft. If you use medium heat or higher, you will burn them before they become soft and chewy! Good food takes patience!! The best thing that I love about Nin Go is that they can last a while in the fridge. Yes they may look like they have hardened, but as soon as you pan fry them, they will be soft as new!Genious, right?! Make sure you always serve them hot/warm. If they even last that long for them to cool off, you can always microwave it for 10-15 seconds to warm them up again!

This year, I have made many batches of Nin Go for friends and family. It’s my way of wishing them a good year, and a token of love from me to them. I made little Chinese New Year gift tags to go with them! I love that picture of my boys:)

DSC02499.JPG

And that, my friends, is my Chinese New Year Nin Go! It will be Chinese New Year tomorrow, but It’s not too late to whip up your first batch of Nin Go to celebrate! We wish you a wonderful and prosperous year of the Monkey, and may you and your family fill this year with many happy memories. Gong Hei Fat Choi!! Happy New Year!

DSC02492.JPG


Stephy’s Nin Go Recipe

Β  2-1/2Cups of glutinous rice flour

Β 300g of cane sugar

1/2cup + 2 tbsp wheat starch

2 cups of water

1 tbsp of coconut milk (optional)

a few slices of ginger (about the size of a large coin. More if you like ginger flavor, like me)

1. Make sugar syrup by boiling the 2 cups of water on the stove. Add in cane sugar and ginger. Let the syrup cool to room temperature.

2. In a large mixing bowl, mix the glutinous flour with the wheat starch.

3. When the syrup has cooled off, add into the flour mixture. Mix until combine. Batter will be clumpy.

4. Sift the mixture twice to dissolve everything.

5. Oil the containers, pour batter into the containers about 3/4 of the way. Be careful not to over fill them as it will be difficult for you to put them into the steamer.

6. Steam Nin Go for 50minutes to 1 hour. You know your Nin Go is done when you test it with a skewer and the skewer feels sticky inside the Nin Go.

7. Enjoy it fresh and warm as it is, or dip them in eggs and pan fry them on low for a golden, warm, and decadent treat!

I have combine several recipes and adapted them to make this my very own Nin Go recipe. Should you want to share it on your site, I would appreciate it if you would credit to this site or to link to my blog. Thanks! πŸ™‚